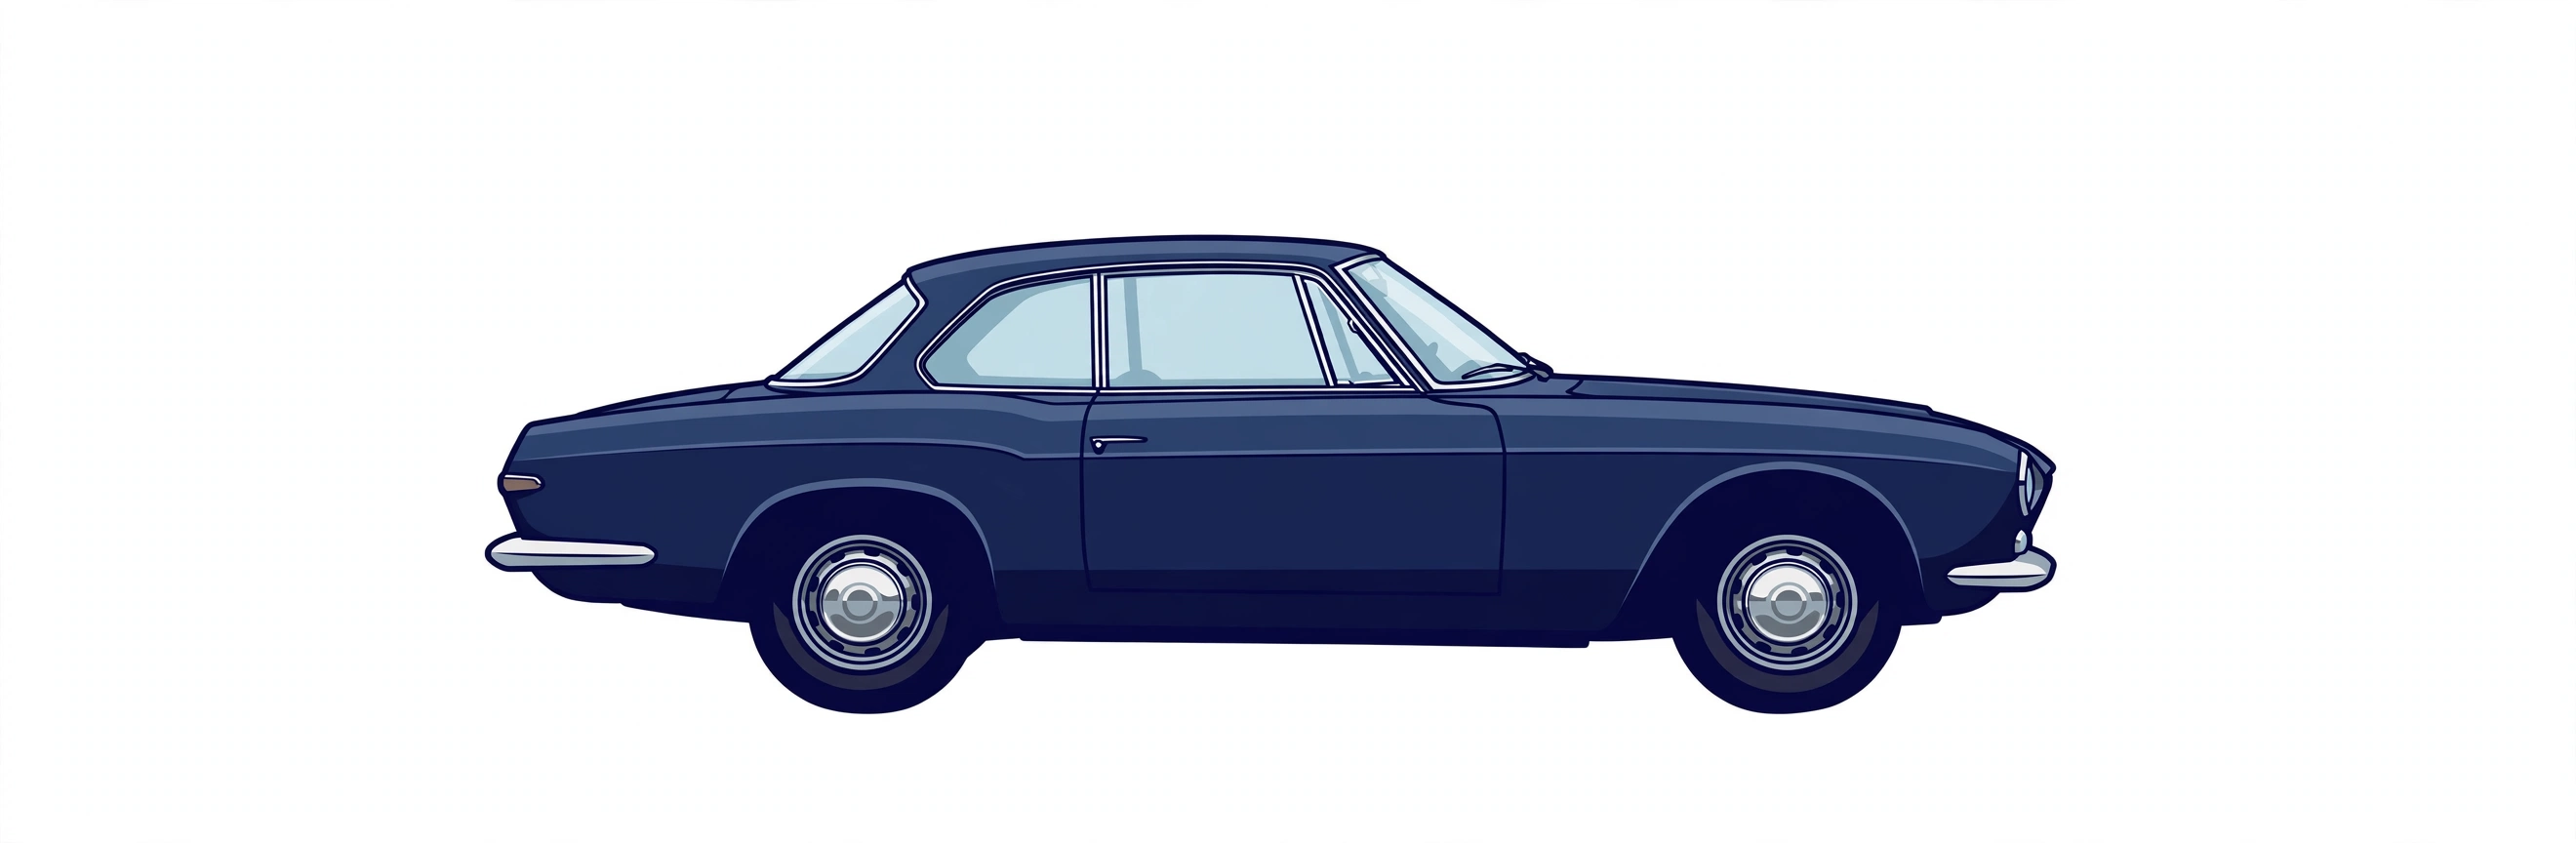
Dodge Challenger Hardtop buyer's guide
Dodge Challenger Hardtop -- the model's own buyer's guide: variants, values and what to check.
Years listed: 1970-1973 · Series: Challenger
Overview and history
The Dodge Challenger hardtop is the two-door pillarless coupe that carried Dodge into the pony-car fight — late, large, and unapologetically built around big engines. Dodge had watched Ford's Mustang create the market in 1964 and Plymouth's Barracuda answer it, and for five years it had no direct rival of its own. The Challenger, launched for the 1970 model year, was that answer: an all-new E-body coupe sharing its basic unibody engineering with the third-generation Plymouth Barracuda, but stretched, widened and finished to a more expensive standard. Where the Barracuda sits on a 108-inch wheelbase, the Challenger hardtop rides on 110 inches, is longer overall, and was sold from the start as the more grown-up, better-trimmed car. That two-inch difference matters today, because almost nothing in the body is interchangeable with the Barracuda despite the family resemblance — Challenger panels, glass and trim are Challenger parts.
The timing was both the car's glory and its curse. The Challenger arrived for 1970, the absolute peak of the muscle-car era, with an engine list that ran from an economy slant-six to the 426 Hemi, and it was gone as a performance car almost as quickly as it came. Insurance surcharges, rising fuel prices, tightening federal emissions and safety rules and a collapsing youth market cut sales year by year. The hardtop was built for five model years, 1970 through 1974, with a clear arc: the wild, high-compression cars of 1970 and 1971, then the detuned, heavier-bumpered Rallye-era cars of 1972 to 1974. The convertible was dropped after 1971; the hardtop carried on alone. This guide covers the hardtop only — the body style that dominates the surviving population and the listings market. In our own store at the time of writing the Challenger Hardtop file holds fifteen cars, nine of them 1970 models, which tells you exactly where buyer demand concentrates.
Styling, led under Dodge design chief Carl Cameron, is the reason the car endures. The hardtop has a long bonnet, a short deck, a full-width grille treatment that changed in detail every year, and a roofline with no B-pillar, so with all four side windows down the car is a true open hardtop. The 1970 car is the purest: a single-piece grille with quad headlamps, a full-width rear lamp panel, and slim bumpers. For 1971 the grille gained a divided centre section and the rear panel changed; for 1972 the car was facelifted more heavily, with a narrower, sadder grille opening — owners call it the sad-mouth grille — separate rear lamps, and from 1973 the federally mandated impact bumpers with prominent rubber guards, extended further for 1974. Learn those year tells, because sellers mis-year cars, trim gets swapped, and a 1972 wearing 1970 panels is a car whose history needs explaining.
Underneath, the Challenger is orthodox Chrysler engineering of the period, which is good news for an owner. It is a unitary body with a bolt-on front subframe section carrying the engine and front suspension. Front suspension is by torsion bars — longitudinal bars that spring the lower control arms — with an anti-roll bar on performance models. The rear axle is a live axle on semi-elliptic leaf springs. Steering is recirculating-ball, manual or power-assisted. Brakes on base cars were drums all round, with front discs optional and increasingly common as you climb the range. None of this is exotic, all of it is rebuildable, and the mechanical specification is shared with hundreds of thousands of other Chrysler products, which is why these cars can still be run as real cars rather than museum pieces.
What defines a Challenger hardtop today is not the engineering. It is identity and rust. The value gap between a genuine R/T, a genuine T/A and a base hardtop wearing their badges is enormous, and the E-body has been cloned, re-bodied and re-tagged for forty years — so the centrepiece of this guide, and of any competent purchase, is verification: VIN, fender tag, broadcast sheet and body numbers, checked against each other before condition is even discussed. And the unibody rusts in structural places — front rails, torsion-bar crossmember, floors, rear rails — in ways that pretty paint conceals completely. A mechanically tired but solid and honest Challenger is a project. A shiny cloned car on a rotten shell is a liability at any price. Everything that follows is organised around those two truths.

The models
Every E-body Challenger hardtop is the same basic shell; what changes is the VIN series, the standard engine, the trim and the suspension and brake specification that came with the performance packages. Understanding the range means understanding that Dodge sold the hardtop at three levels at once: as cheap transport with a six-cylinder engine, as a well-trimmed personal coupe with a small V8, and as one of the fastest production cars in America. Survivors span all three, and asking prices span them even more widely, so badge literacy is not snobbery — it is how you avoid paying performance money for a transport car.
| Model | Years | Engine | Output | Built | Character |
|---|---|---|---|---|---|
| Challenger (base, six) | 1970–1974 | 225 slant-six; 198 six in early base cars | 145 hp (225, gross) | Part of base production | Economy coupe; rare survivor, usually converted to V8 |
| Challenger (base V8) | 1970–1974 | 318 LA V8, 2-barrel | 230 hp (1970, gross) | The volume hardtop | The honest driver; the clone donor — check every one |
| Challenger 340 | 1970–1973 | 340 LA V8, 4-barrel | 275 hp (1970, gross) | — | Light, revving small-block; the driver's big-value alternative |
| Challenger R/T | 1970–1971 | 383 Magnum standard; 440, 440 Six-Pack, 426 Hemi optional | 335–425 hp (gross) | 1970 R/T hardtop production in the mid-teens of thousands across engines | The genuine article carries a JS VIN — see Problem areas |
| Challenger SE | 1970–1971 | 318 or big-block per order | As ordered | — | Formal roof, small rear window, overhead console; trim, not performance |
| Challenger T/A | 1970 only | 340 Six-Pack | 290 hp (gross, advertised) | 2,399 | Trans-Am homologation special; the most cloned Challenger of all |
| Challenger Rallye | 1972–1974 | 318, 340 (1972–73), 360 (1974) | Net ratings, falling yearly | — | R/T's successor in name and trim, not in big-block power |
(Outputs are period factory ratings — gross figures for 1970–71, net figures thereafter — and are given for relative character, not as dyno promises. Production figures are stated only where they are firmly documented; where a breakdown is not reliably separable from total Challenger production, the table says so rather than inventing a number.)
The base hardtop (VIN series JH). The standard Challenger hardtop is the car most survivors actually are. Six-cylinder cars came with the 225 slant-six — and a smaller 198-cubic-inch version of the same engine in the cheapest early cars, including the stripped Deputy coupe, a short-lived budget model with fixed rear side windows and minimal trim. V8 base cars came with the 318 two-barrel as the staple engine, with the 340 four-barrel as the thinking buyer's option. Base cars got drum brakes unless discs were ordered, soft suspension, and interiors in vinyl that ranged from austere to genuinely plush depending on options. Do not dismiss them: a straight, rust-free 318 hardtop is the best-driving, cheapest-to-run Challenger there is, and the market's obsession with letters and badges leaves them comparatively undervalued. But because a base hardtop plus a set of badges equals an apparent R/T, every base car must be read as a potential clone donor — the identity section below is written for exactly this car.
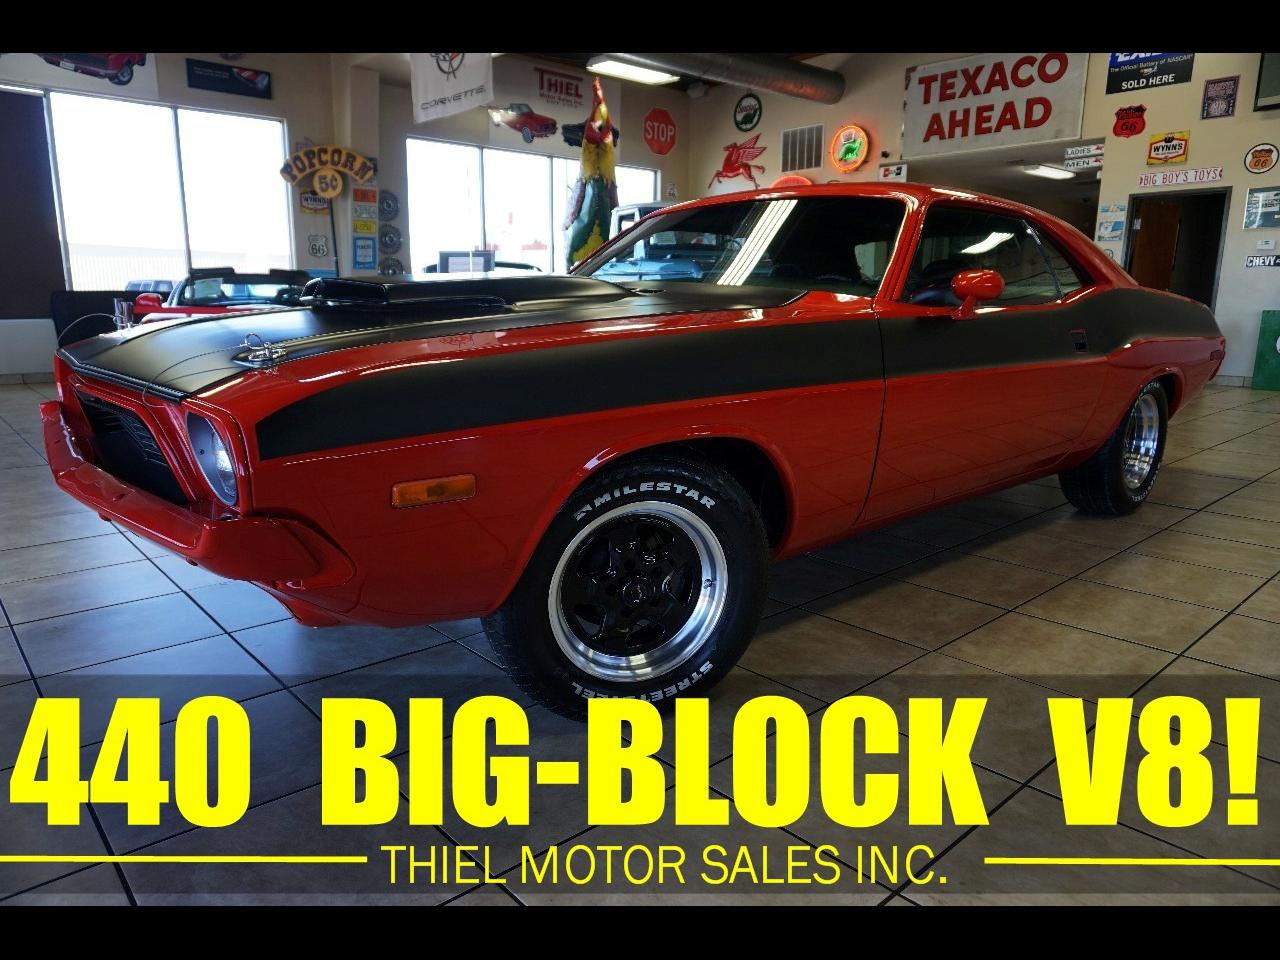
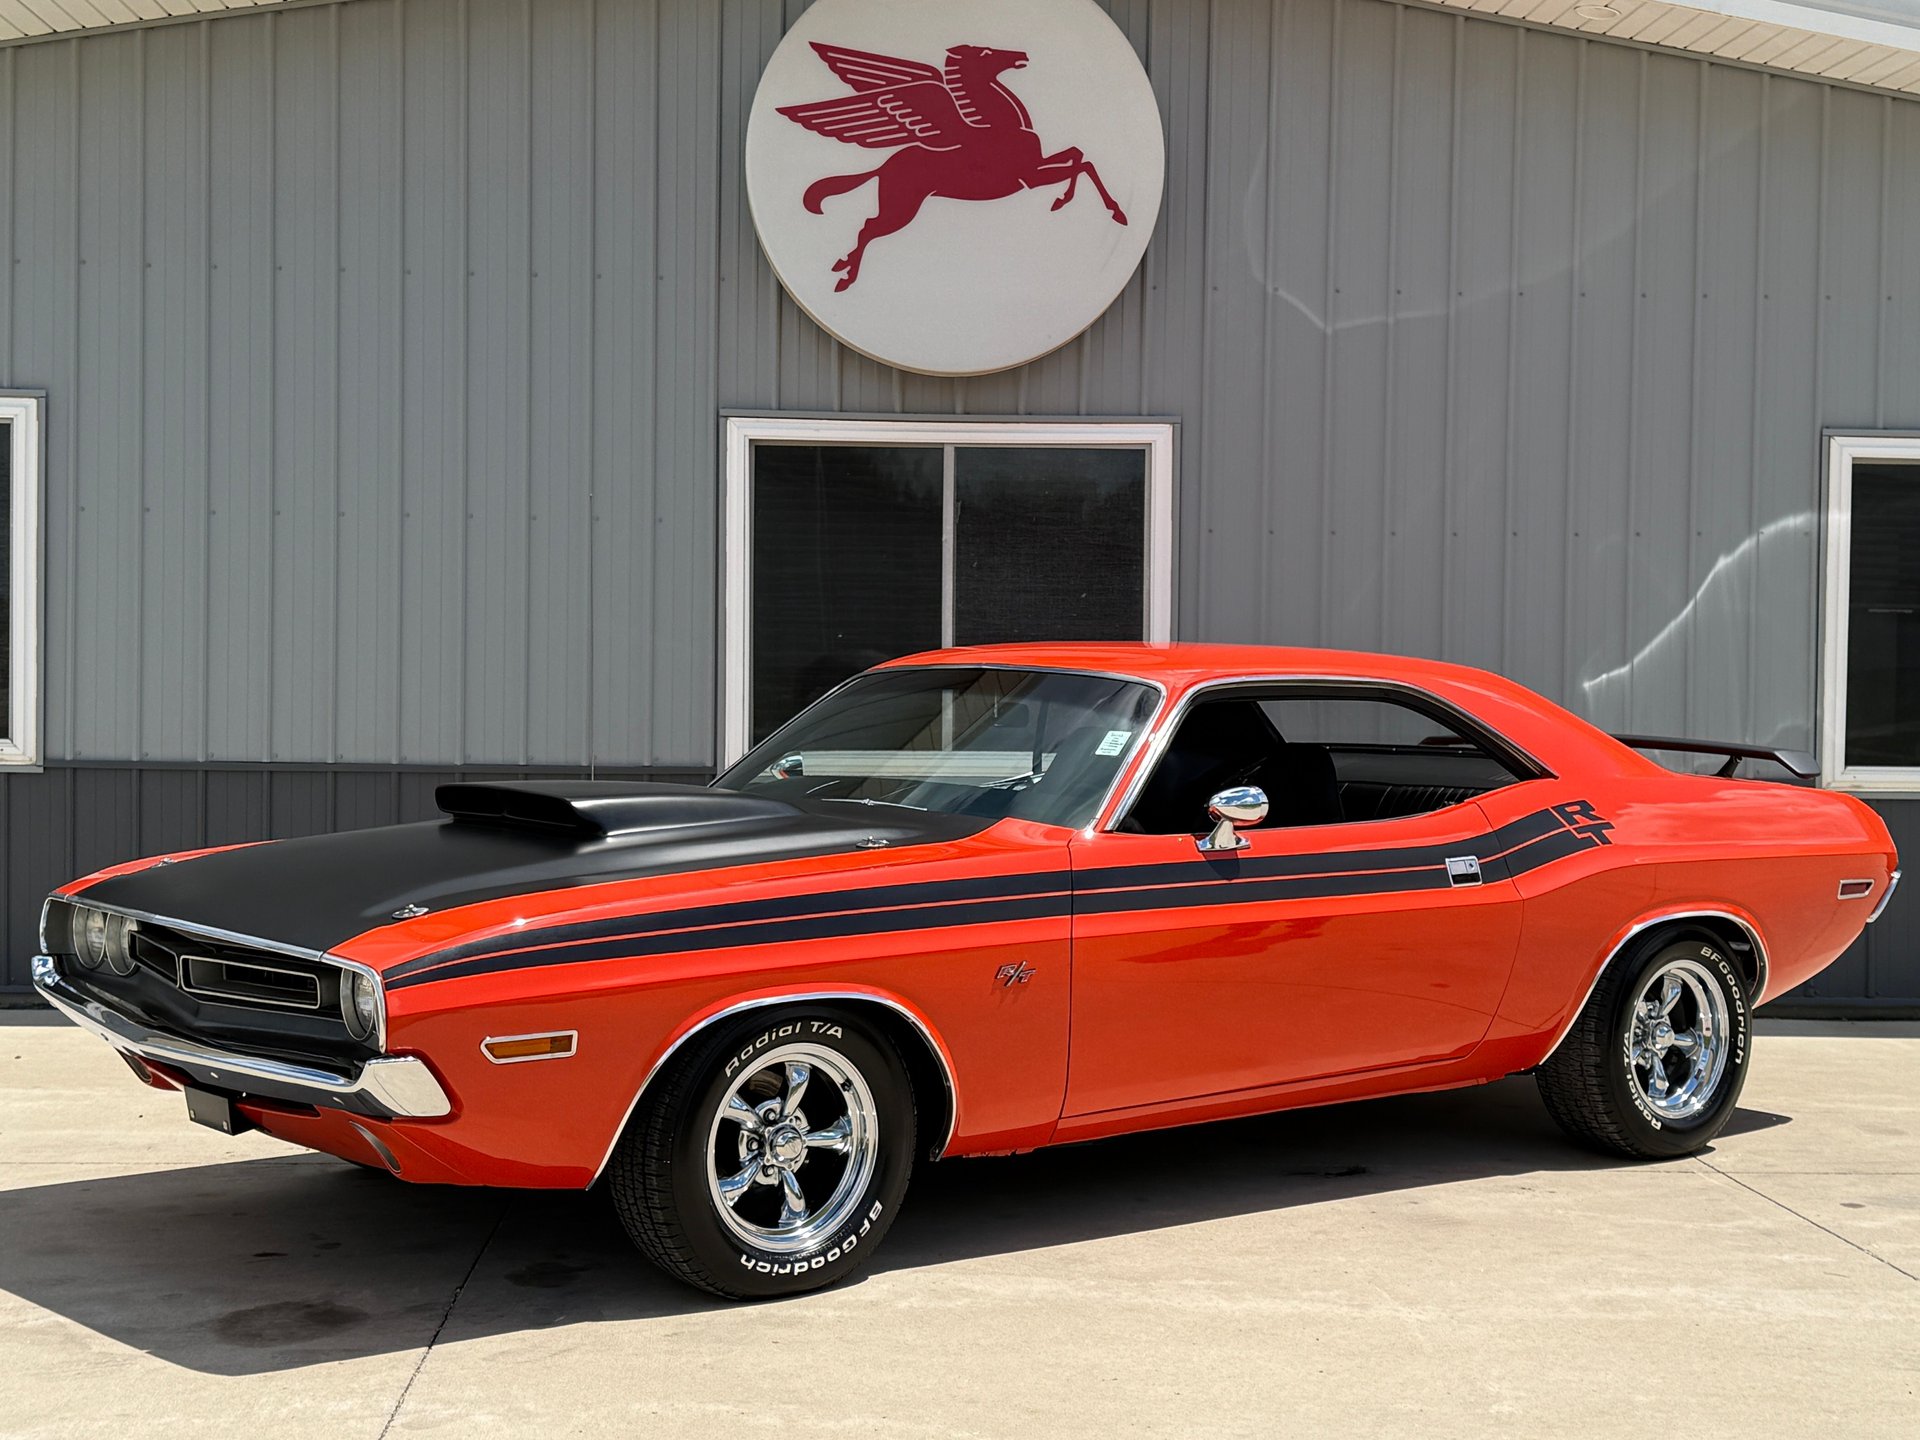
The R/T (VIN series JS, 1970–71). R/T — Road/Track — was a separate series, not an option package, and that is the single most useful fact in Challenger buying: a genuine 1970 or 1971 R/T hardtop has a VIN beginning JS23, while a base hardtop is JH23. Standard R/T equipment was the 383 Magnum four-barrel big-block, heavy-duty suspension and brakes, a performance hood with twin scoops, stripes and badging. Options climbed through the 440 Magnum four-barrel, the 440 Six-Pack with three two-barrel carburettors, and at the summit the 426 Hemi. R/T hardtops were also offered with the SE formal roof as the JS29 car. After 1971 the R/T name was retired as big-blocks left the range.
The SE (Special Edition). The SE package — VIN body code 29 in place of 23 — gave the hardtop a formal vinyl-covered roof with a much smaller rear window, an overhead console with warning lamps, and upgraded interior trim. It could be ordered on base and R/T cars alike. Check SE cars with extra care in two places: the vinyl roof traps moisture against the roof skin and the small rear window's surround, and the overhead console electrics add failure points. A rust-bubbled SE roof is a vinyl-off, metal-out repair, not a trim job.
The T/A (1970 only). The Challenger T/A was built to homologate Dodge's entry in the SCCA Trans-American sedan series. Its 340 Six-Pack engine — three Holley two-barrel carburettors on an aluminium Edelbrock intake, the centre carburettor doing cruising work and the outboards opening under load — sat under a matte-black fibreglass hood with a functional scoop. T/As also got a fast-ratio steering box, heavy-duty suspension, larger rear tyres than fronts (an American production first, widely cited), side-exit exhausts ahead of the rear wheels, a ducktail rear spoiler and distinctive striping. It is a package (sales code A53) on the base JH hardtop shell with the J-code 340 Six-Pack engine — which is precisely why it is cloned so often: there is no unique T/A VIN series to hide behind, so paperwork and component verification do all the work. The full test is set out in Problem areas.
The Rallye (1972–74). With emissions rules and insurance pressure ending the big-block era, Dodge replaced the R/T with the Rallye: simulated fender scoops, strobe stripes, Rallye instrumentation and suspension tuning, but engines limited to the 318, the 340 (1972–73) and the new 360 for 1974, all in low-compression, net-rated, emissions-controlled form. These are slower cars, and the market prices them accordingly, but they are also the cheapest way into a genuine, unmolested E-body, they ride and handle on the same fundamentals, and their originality is often better simply because nobody cloned a Rallye. The 1974 cars are the last of the line and the rarest by survival.

Engines and gearboxes
The slant-six and the LA small-blocks: 225, 318, 340 and 360
The slant-six (198 and 225). Chrysler's inclined six — canted 30 degrees to fit under low bonnets — is one of the most durable engines ever put in an American car. In the Challenger it is the economy fitment, most often in cars that have since been converted to V8 power, which is itself a check: a six-cylinder VIN (the engine code in the VIN will be for a six) under a car now carrying a V8 means the car is a conversion, valued as one, whatever its badges say. In original cars, judge the six on its own terms. It should start readily, idle smoothly and pull without drama. The characteristic faults are exhaust-manifold cracking (a ticking that is loud cold and quietens as the manifold expands and partly seals — listen on a genuinely cold start, because a warm engine hides it), worn valve guides giving a puff of blue smoke on start-up, and carburettor wear on the single-barrel Carter or Holley units showing as a flat spot just off idle. None is expensive: a manifold is a breaker's-yard part, and a carburettor rebuild is a $150–400 job. A six that smokes under sustained load, knocks under load or shows milky oil is simply worn out, and a rebuild runs $2,500–4,500 — more than the engine's contribution to the car's value, which is why most tired sixes become V8 conversions instead.
The 318 LA. The 318 cubic-inch LA-series small-block, two-barrel carburettor in Challenger service, is the range's workhorse: understressed, torquey, tolerant of neglect and cheap to keep. Its party trick is longevity — bottom ends routinely outlast the cars — so faults concentrate in the bolt-ons and the top end. The nylon-toothed timing chain sprocket fitted in period wears and sheds teeth with age and mileage; the chain stretches, valve timing retards, and the symptoms are a car that has gradually gone flat, idles roughly and may show a flickering timing mark under a strobe as the chain slaps. The distinguishing test is to rock the crankshaft pulley back and forth by hand with a socket while watching the distributor rotor: excessive free movement before the rotor turns is chain slack, measured in degrees. A steel timing set is a $400–800 fitted job and transforms a tired-feeling 318. Lean-burn and emissions-era carburation on later cars adds flat spots that are mixture, not ignition: check the choke pull-off and the carburettor's idle mixture before condemning anything electronic, because on 1972-on cars there is very little electronic to condemn. Oil leaks from the rear main seal and the valve covers are near-universal and are priced as housekeeping, not failure. Blue smoke on the overrun after a long downhill is valve stem seals — a $300–700 job done with the heads on — while smoke under power is rings, and that is rebuild money, $3,500–6,000 for a quality 318 rebuild.
The 340 LA. The 340 is the connoisseur's small-block and one of the great American performance engines: high-compression in 1970–71 form with a forged crankshaft in early cars, big-valve heads, a windage tray and a Carter four-barrel (AVS, then Thermoquad in later years), deliberately underrated in period advertising. It wants to rev in a way no big-block does, and in the relatively light hardtop it makes the best-balanced fast Challenger. Its specific checks differ from the 318's. First, identity: 340s are valuable and are routinely represented where a 318 or a later 360 sits — the engine's displacement is cast into the side of the block, and the stamped pad and casting date must agree with the car's year; a 340 claimed for a car whose VIN engine code is G (318) is a swap, full stop. Second, valve gear: solid, mechanical valvetrain behaviour is not a 340 trait in street form — the street 340 uses hydraulic lifters — so a rattling top end is wear, maladjustment of aftermarket parts, or low oil pressure, not character. Third, the Thermoquad carburettor on 1971-on cars: its phenolic resin float bowl warps and its wells leak with age and heat, giving hard hot starting and a rich smell; the test is a hot restart after a ten-minute heat soak, and the fix ranges from a $250–500 rebuild to replacement with a modern carburettor, which many drivers prefer and collectors discount. A healthy 340 shows strong, even oil pressure, no smoke, and a willingness to pull hard past 5,000 rpm without flattening — a 340 that will not rev is usually carburation, ignition advance seized in the distributor, or that stretched timing chain again, in roughly that order of cost.
The 360 LA (1974). The 360 replaced the 340 for the Challenger's final year: longer stroke, low compression, emissions-tuned, and softer in every way. It is a perfectly good road engine and responds to the same checks as the 318, with one addition — 1970s emissions plumbing. Air pumps, EGR valves and a thicket of vacuum hoses perish and leak, and the resulting vacuum leaks present as a hunting idle and hesitation that owners misdiagnose as carburettor failure. Smoke-test or hose-by-hose elimination finds them; a full vacuum-hose renewal is $100–300 in parts and an afternoon, and it is the cheapest performance upgrade a late car can get.

The big-blocks: 383 and 440 B/RB wedges, 440 Six-Pack and the 426 Hemi
The 383 Magnum (B-series). The standard R/T engine is a short-deck B-series wedge: 383 cubic inches, four-barrel Carter AVS, high-performance exhaust manifolds, a windage tray and a hotter camshaft than the two-barrel 383 fitted to base cars. It is a superb road engine — strong from low revs, almost unburstable in street use, and cheaper to rebuild than any other performance Challenger engine because the B-series was built in the millions. Its age faults are shared with the 440 below: exhaust manifold studs that snap on removal (budget $300–800 for stud extraction and manifold refacing on any car needing exhaust work), heat-related carburettor percolation giving hard hot starting, and oil consumption through hardened valve stem seals. A 383 that rattles at the front is usually the timing chain; a deep knock that follows load is a bottom end, and the engine's cheapness cuts both ways — a full rebuild at $4,500–7,500 is rational money on a genuine R/T and irrational on a clone.
The 440 Magnum and 440 Six-Pack (RB-series). The 440 is the raised-deck RB engine — taller and wider than the 383, which is why engine-bay room in a big-block E-body is tight and why plug changes and manifold work take longer. In Magnum form it runs a single Carter four-barrel; the Six-Pack substitutes three Holley 2300 two-barrels on an aluminium intake, the centre carburettor metered for cruising and the vacuum-operated outboards opening progressively. Six-Pack behaviour is the test: a correct car cruises cleanly on the centre carburettor and pulls with a distinct second surge as the outboards open. A car that bogs, then surges violently, has linkage or vacuum-diaphragm faults; a car that is rich and sooty at cruise has centre-carburettor or float faults. Do not let a seller blame "Six-Pack character" — when set up, they are docile. Setup, however, is specialist work: a full Six-Pack strip, rebuild and tune runs $800–1,800, and missing or incorrect carburettors (the outboard units are Six-Pack-specific) cost real money to replace. Heat is the RB's other theme: big-blocks in E-bodies run hot in traffic if the cooling system is marginal, and a car that creeps upward at idle but cools at speed has an airflow or fan-clutch problem, while one that is hot everywhere has a radiator, water-pump or head-gasket problem — the distinction is made by watching where the temperature rises, and it is made on the test drive, not in the advert. Head-gasket failure on a wedge usually shows as coolant loss with no visible leak, bubbles in the radiator header with the cap off and the engine warm, or a single steam-cleaned spark plug among sooty ones; pull the plugs and read them as a set.
The 426 Hemi. The street Hemi is a different engine from the wedges in everything but the RB-derived block architecture: hemispherical combustion chambers, two huge valves per cylinder worked by an elaborate rocker layout, dual Carter AFB four-barrels on a cross-ram-style street intake, and a reputation earned in racing. In a Challenger it was R/T-only, expensive when new, and is now the summit of the market — which makes Hemi identity the highest-stakes verification in this guide, covered in Problem areas. Mechanically, judge a Hemi as follows. Cold behaviour: dual quads with period chokes are lumpy and rich until warm; judge it hot. Oil: Hemis use oil at the top end and period cars were not expected to be oil-tight; what matters is pressure (strong at speed, present at hot idle) and smoke pattern — seals on the overrun, rings under load, as with the small-blocks. Valve gear: the Hemi's valvetrain is its glory and its service bill; noisy top ends, bent pushrods from over-revving and worn rocker gear are the known costs, and any internal Hemi work is specialist work at specialist prices — a quality rebuild is a five-figure job, $15,000–30,000 depending on parts and originality requirements, which is why documented Hemi engine history moves prices more than any paint job. Ignition: dual-point distributors in early cars wear and drift; electronic conversions are common, sensible for drivers and a deduction on a car sold as unmolested. Finally, numbers: a Hemi Challenger with a non-original engine is a different financial object from a numbers-matching car, and the difference is established by the stampings and paperwork drill below, never by the seller's assurance.
Gearboxes: three-speed manual, A833 four-speed, and TorqueFlite
Challengers came with three gearbox families, and the fender tag and broadcast sheet both record which one the factory fitted — a gearbox swap is common and not fatal, but it must be known and priced.
The base gearbox was a three-speed manual, column- or floor-shifted, fitted to sixes and 318s; it is sturdy, charmless and rarely the reason anyone buys a car. Judge it on synchromesh into second and on clutch judder pulling away.
The four-speed is Chrysler's A833, one of the strongest manual gearboxes of the era, fitted behind everything from the 340 to the Hemi, with Hurst shifters (pistol-grip in 1970–71 cars) that are themselves collectible and frequently replaced. The A833's tests are: synchromesh on the second-to-third and third-to-second changes at speed (worn synchro rings crunch before anything else fails), jumping out of gear on the overrun in second or third (worn engagement teeth or a tired detent — a rebuild, $1,200–2,500), and whine in the indirect gears that quiets in fourth/direct (bearing and layshaft wear). Linkage slop from worn Hurst bushings mimics all of these and costs $50–150 in parts — always check the linkage before pricing a rebuild. Clutches on big-block and Hemi cars live hard lives; a high, slipping bite point under full-throttle load in a high gear is the test, and a clutch replacement runs $700–1,400 fitted depending on engine.
The automatic is TorqueFlite: the lighter A904 behind sixes and small-blocks, the heavy-duty A727 behind big-blocks and Hemis, both three-speeds with a well-earned reputation as the best American automatic of the period. A good TorqueFlite shifts firmly and promptly, kicks down decisively, and engages drive and reverse from neutral without delay or thump. The diagnostic grammar is simple. Delayed engagement when cold that improves warm suggests low fluid, a clogged filter or hardened seals — start with a fluid and filter service, $200–400. Flaring (rev rise) on the two-three shift is band/clutch wear and is a rebuild conversation, $1,500–3,000 at a transmission specialist. Shudder pulling away points to the torque converter. Burnt-smelling, brown fluid on the dipstick is a gearbox that has been hot and worn; bright red fluid in a car with no service history may simply mean the fluid was changed for the sale, so read the shifts, not just the dipstick. The kickdown linkage matters more than buyers realise: it also controls line pressure, and a disconnected or maladjusted kickdown rod will burn an A727 up in short order while feeling deceptively smooth — verify it is connected and correctly adjusted on any automatic car, a five-minute check that protects a four-figure component. Manual-versus-automatic values differ by model: four-speeds command premiums behind 340s, big-blocks and Hemis, while on a 318 cruiser the automatic is the nicer ownership proposition and the market knows it.
Problem areas
Everything else in this guide assumes the car in front of you is what it claims to be. This section starts earlier, with identity, because on an E-body Challenger identity is a problem area in its own right — the most expensive one there is. Then come the structural and mechanical faults in the order they should end a purchase: shell first, running gear second, cosmetics last. A note on our own evidence, stated honestly: our store's photo-note file for this model is small — five cars examined in detail — and rust was mentioned in the notes for two of those five. That is too small a sample to quote percentages from, and we do not. It is consistent with what every E-body specialist will tell you, which is that rust assessment, not mechanical assessment, is where Challenger purchases are won and lost.
Identity: VIN, fender tag, broadcast sheet and the clone problem
The VIN. A 1970–74 Challenger carries a thirteen-character VIN, visible on a plate at the base of the windscreen on the driver's side and repeated in partial form as stampings on the body itself. Read it character by character, aloud, against the title. The first character is the car line: J for Challenger. The second is the series — and this is the letter that prices the car. H denotes the base Challenger series; S denotes the Special series, which for 1970–71 means a genuine R/T (or an R/T SE). A car presented as a 1970 R/T whose VIN begins JH is not an R/T, whatever engine now sits in it, however long ago the conversion was done, and whatever the seller believes. It is a base hardtop with R/T equipment, and it must be priced as one. The third and fourth characters are the body: 23 is the two-door hardtop covered by this guide; 29 is the SE formal-roof hardtop; 27 is the convertible. The fifth character is the engine the factory fitted — the codes every buyer should learn before viewing: B for the 198 six, C for the 225 six, G for the 318, H for the 340 four-barrel, J for the 340 Six-Pack fitted to the T/A, L for the 383 two-barrel, N for the 383 Magnum four-barrel, U for the 440 four-barrel, V for the 440 Six-Pack and R for the 426 Hemi. The sixth character is the model year (0 for 1970, 1 for 1971, and so on), the seventh is the assembly plant (B for Hamtramck, E for Los Angeles on E-bodies), and the remaining six are the sequential build number. Cross-checks follow immediately. An R/T must have a big-block engine code (N, U, V or R) in position five: a JS car with a G code is a contradiction that means a tag or a transcription is wrong. A T/A must have the J code and a 1970 year character; a J-code car from any other year does not exist as a factory T/A. From 1972 the R/T was gone, so any claimed 1972–74 R/T is a Rallye or a base car in costume, and late-car engine codes shrink to the small-block range actually offered.
The body stampings. The VIN plate alone proves nothing, because plates can be moved. E-bodies carry partial VIN stampings on the body shell itself — most usefully on the radiator core support and on the cowl/firewall area near the windscreen — giving the series, year, plant and sequence number. On any car carrying a performance premium, find at least one body stamping and confirm it matches the VIN plate and the title. A mismatch is not a negotiating point; it is the end of the viewing until paperwork explains it, and on a Hemi or Six-Pack car it is simply the end. Rivets matter too: factory VIN plates are attached with correct rosette-style rivets, and a plate held by ordinary hardware-store pop rivets has been off the car for a reason that must be documented, not narrated.
The fender tag. The stamped metal tag screwed to the top of the driver's-side inner front wing, under the bonnet, is the factory's build record for the car: paint and trim codes, scheduled build date, order and sequence numbers, engine and transmission codes, and the option codes that define the car as ordered. Learn the lines that matter. The bottom line carries the VIN sequence and the engine/transmission identifiers; paint codes identify the original colour — period High-Impact colours such as FC7 Plum Crazy, FJ5 Sublime and FE5 Rallye Red carry their own premiums, and a tag showing a mundane original colour under a High-Impact respray reprices the car honestly. Option codes confirm or deny the equipment the price rests on: the A53 Trans-Am package on a claimed T/A, disc brakes, console, Sure-Grip limited-slip differential, air conditioning, and the performance axle packages. Two traps recur. First, tags are reproduced: a crisp, new-looking tag with modern font characteristics on a fifty-year-old inner wing is a reproduction until proven otherwise, and a reproduction tag is evidence of nothing except that someone wanted the car to read a certain way. Second, tags go missing legitimately — inner wings get replaced after accident damage — so a missing tag is not automatic condemnation, but on a premium model it transfers the entire burden of proof to the broadcast sheet and the body stampings, and the price must reflect the doubt that remains. Photograph the tag on every viewing and decode it at leisure; never decode under sales pressure.
The broadcast sheet. The broadcast (build) sheet is the paper line-worker's copy of the car's full specification — every option, every component code, the scheduled build data — and copies were left in the car at assembly, most often under the rear seat springs, sometimes behind the glovebox liner, under the carpet or above the headliner. It is the single most complete identity document an E-body can have, because it ties the VIN to the engine, gearbox, axle, paint, trim and options in one factory artefact. A claimed R/T, T/A, Six-Pack or Hemi car with a legible broadcast sheet matching its VIN, fender tag and body stampings is as verified as these cars get. A car with no sheet is not thereby false — sheets rot, and mice eat them — but the verification standard then becomes component-by-component: engine stampings and casting dates a plausible few weeks before the car's build date, correct carburettors, correct gearbox, correct axle. Sellers of genuine premium cars usually know exactly what documentation they hold and produce it early. Sellers who produce a story instead of documents are telling you how to price the car.
The clone problem, stated plainly. Cloning an E-body is easy because the shell is common to all models: badges, stripes, a performance hood, a big-block engine and a set of R/T suspension parts turn a JH 318 hardtop into a convincing visual R/T in a weekend. T/A cloning is easier still in one sense — the T/A has no unique VIN series — and harder in another, because the T/A's correct components (fibreglass hood, Six-Pack induction with the right carburettors, fast-ratio box, side-exit exhaust, staggered tyre sizes, ducktail spoiler) are numerous, specific and expensive to assemble honestly. The market's defence, and yours, is that a clone can copy the look but not the paper trail: it cannot produce a JS VIN, a J engine code with a matching broadcast sheet, or body stampings that agree. Buy the documents first and the car second. A disclosed clone or tribute, priced as the base car plus the value of its parts and workmanship, is a legitimate purchase and often a great driver. An undisclosed clone at genuine-car money is the most common way buyers lose five figures on this model, and it is entirely preventable with the twenty minutes of checking set out in the inspection checklist below.

Rust: the unibody map
The Challenger is a unibody: the shell is the structure, there is no separate chassis to save a rotten body, and rust in the wrong places is structural failure, not cosmetics. Work the map in this order, because it is the order of expense.
Front frame rails and radiator support. The front rails run from the firewall forward under the engine bay and carry the subframe, suspension loads and bumper. They rot from the inside, fed by road spray and battery acid on the driver's side, and by the time external bubbling shows around the rail tops and the support panel, section loss is advanced. Prod with a screwdriver (with permission) along the rail undersides and around the core-support mounts; perforation here is fabrication work, typically $1,500–4,000 a side done properly with the engine bay stripped, and it is the repair sellers' photographs most reliably avoid. A car with no underside photographs in its listing is a car whose underside you must see in person before any deposit.
Torsion-bar crossmember and front floors. The transverse member that anchors the rear ends of the torsion bars is a known E-body failure point: it traps mud against the floor, and when it rots the suspension anchorage itself is compromised. It is checked from underneath, by eye and by prod, where the member meets the floors and rails. Front floor pans rot from both sides — from leaks above (windscreen seals, cowl vents, heater boxes) and from the crossmember trap below — so lift the carpets as well as crawling underneath. Floor sections are available and a pan fitted and finished runs $600–1,500 a side, but floors, like the crossmember, rarely rot alone: read them as a verdict on the whole front structure.
Cowl, windscreen surround and door apertures. Water standing in the cowl plenum rots the cowl sides and the lower windscreen pillars, then tracks into the front footwells and the door hinge pillars. The visible tells are bubbling at the windscreen corners, water staining on the kick panels, and doors that have dropped on their hinges because the pillar metal behind them is soft. Hinge-pillar and cowl repair is skilled, slow work — $1,000–3,000 depending on spread — and it is structural in the sense that door fit and windscreen sealing both depend on it. Run a fingertip along every door's bottom edge too: E-body doors fill with water when their drain slots block, and a door bubbling along its lower skin is a door that has been a tank.
Rear quarters, wheelhouses, trunk floor and rear rails. The rear of the car rots as a system. The quarter panels bubble behind the wheel openings where the outer skin meets the inner wheelhouse; the trunk floor and its drop-off extensions rot from leaks at the rear window and the trunk seal, hidden under the mat and the spare; and the rear frame rails — which carry the leaf-spring hangers — thin from the inside, worst around the spring perches and shackle mounts. Lift the trunk mat and the spare wheel on every viewing, prod the floor corners and extensions, and from underneath, prod the rails at the spring mounts and check the shackle bushes' metal, not just the rubber. Trunk floor replacement is $800–2,000 fitted and painted; rear rail repair is fabrication, $1,500–4,000 a side, and a car needing both rails, both quarters and a trunk floor is a re-shell candidate priced accordingly — which is to say, priced as parts and paperwork, not as a car. The panel behind the rear window (the Dutchman panel) and the rear window channel deserve the same fingertip check as the front: leaks here are what feed the trunk.
Roofs, including the SE trap. Standard hardtop roofs rot at the drip rails and around both screens where vinyl or sealant has held water. SE cars add the formal vinyl roof over a smaller rear window: bubbling under vinyl anywhere on an SE roof means stripping the vinyl and repairing the skin — $1,000–2,500 with paint and new vinyl — and the small-window surround is a fabrication repair if the channel has gone. Never accept "it's just the vinyl" without pressing the bubbles: soft means metal, and metal means money.
The cover-up test. Fresh black underseal blown uniformly over rails, floors, brake pipes and fasteners the week before a sale is a concealment until proven otherwise; factory and honest old underseal is patchy, chipped at edges and dirty in a way that matches the rest of the car. A magnet wrapped in cloth run over quarters, door bottoms and the lower front wings finds filler; inconsistent readings mean bodywork whose depth only a strip will reveal. None of this condemns a car — most survivors have had paint and some metal — but every undisclosed repair you find reprices the car, and a seller surprised by your findings is a different negotiation from a seller who documented them.
Suspension, steering, brakes and tyres
The torsion-bar front end fails by wear and by seizure, and the two must be distinguished because their prices differ by an order of magnitude. Ball joints (upper and lower), tie-rod ends, idler arm and the pitman arm all wear, and the test is the classic one: with the front of the car supported correctly, rock each front wheel at top and bottom for ball-joint play and at the sides for steering linkage play, then watch the joints while an assistant rocks the steering. Play in a joint is a part — ball joints run $300–700 a side fitted with alignment — while play everywhere is a front-end rebuild, $1,200–2,500 done completely, and a car that wanders, tramlines and wears its front tyres on the inner edges is telling you it needs exactly that. Torsion bars themselves rarely break, but their rear anchors rot (see the crossmember, above), their adjusters seize, and ride height tells the story: measure from the ground to the wheel-arch lip on both sides on level ground, because a car sitting low or lopsided at the front has a bar, anchor or adjustment problem, while one sitting low at the rear has tired leaf springs or worn shackle bushes. Leaf springs sag, crack leaves at the eye, and perish at the bushes; a re-bushed, re-arched or replacement spring set runs $500–1,200 fitted, and a rear end that steers the car over bumps — the axle moving on worn bushes — is fixed by the same job.
Steering boxes, manual and power, wear at the centre of travel where they live, giving free play straight ahead that adjustment only partly cures: the distinguishing test is whether play remains after correct adjustment with the box centred, because off-centre adjustment masks wear while binding the box at the locks. A rebuild or quality exchange box is $400–900 fitted. Power-steering pumps whine when worn or low, and hoses weep; neither is serious alone, both are reliable deferred-maintenance markers. The fast-ratio box in a T/A is a specific, valuable component — another line on the T/A verification list, checked by its part identity and by lock-to-lock turns (fast-ratio cars need noticeably fewer) rather than by feel alone.
Brakes divide by fitment. Base drum-brake cars stop adequately when everything is new and poorly when anything is old: seized wheel cylinders, oval drums and perished hoses are the standard recommissioning list, $600–1,400 for a full hydraulic and friction refresh. Disc-brake cars — standard on performance models, optional elsewhere — suffer seized caliper pistons and rusted discs after storage; a car that has stood wears a rust band and a lip on every disc, and the pedal feel tells you little until the car has been driven and braked repeatedly. Brake hard from speed on the test drive: pulling to one side is a caliper or hose, judder is disc thickness variation, and a pedal that sinks slowly at a standstill is a master cylinder bypassing internally — $200–450 for the cylinder, and a reason to budget the whole hydraulic system, because its seals are all the same age. Handbrakes on E-bodies are cable-operated on the rear shoes and are routinely seized or stretched; a handbrake that barely holds is its own small job, not a verdict on the service brakes.
Tyres date every car honestly. Check the date codes, not just the tread: decade-old tyres with full tread are a $700–1,400 replacement set before the car is used in anger, and mismatched sizes on a claimed T/A — which left the factory staggered, larger at the rear — are another small identity tell to file with the rest.
Electrics, interior and trim
Chrysler electrics of this era fail at two famous points, and both are testable at a viewing. The first is the bulkhead connector, where the engine-bay harness passes through the firewall: its terminals corrode, resistance rises, the connector heats and melts, and the symptoms are intermittent everything — flickering lights, a wandering ammeter, a car that cuts out over bumps. Pull the connector apart on any suspect car (or have the seller do it) and look for green corrosion and heat-distorted plastic; cleaning and terminal repair is $150–500 in labour, a melted bulkhead is a harness conversation at $800–2,000. The second is the ammeter itself: full charging current passes through the dashboard ammeter, its terminals loosen and overheat with age, and the failure mode ranges from a dead gauge to, in the worst documented cases, a dash fire. A bypassed ammeter is a common, sensible modification on a driver; on a car sold as original it must be disclosed, and loose or heat-discoloured ammeter terminals found on inspection are a fix-before-driving item, not a cosmetic one. Voltage regulators and alternators are cheap and shared across Chrysler's range; a charging system that holds a steady needle and brightens nothing at revs is healthy, while flicker at idle is usually connections, not components.
The rest of the electrics are age, not design: window regulators (manual cars) wear at the quadrant, electric windows where fitted fail at switches and motors in that order, the Rallye instrument cluster's gauges fail individually and are rebuildable at $300–800 for a cluster restoration, and heater blower motors die expensively only in labour terms — test the heater on every viewing, whatever the weather, because a dead blower on an air-conditioned car is a dashboard-out job at $800–1,800 all-in. Vacuum-operated and cable heater controls seize; work every lever gently and treat a control that will not move as a cable or a valve, not as a challenge to force it.
Interiors decide how a Challenger feels and hide their costs in plain sight. The vinyl itself is tough; what fails is underneath and around it. Seat foam and burlap crumble, so sit in the driver's seat and feel for the frame: a hammock seat is a strip, re-foam and re-cover at $500–1,200 a front seat done professionally, and a full interior retrim in correct materials runs well into four figures per car — $3,500–8,000 depending on material and whether the SE's overhead console and formal trim are involved — which is why a sound original interior is worth a premium no engine option quite matches. Dash pads crack across the top in sun-state cars (and most survivors are sun-state cars): a correct replacement pad is $600–1,200 fitted, a plastic cap is a tenth of that and looks like it. Headliners sag and tear at the seams, door cards warp at their lower edges from the same water that rots the door bottoms — read a warped lower door card as a rust instruction, and go back to the door drains — and carpets hide the floor verdict, which is why the inspection has you lift them rather than admire them. Chrome and bright trim pit; the Challenger's full-width rear lamp panel and its year-specific grilles are the expensive, model-specific pieces, and a cracked or badly pitted grille on a 1970 or 1971 car is a hunt, not a catalogue order. Price brightwork car by car: a full re-chrome and trim restoration is a four-figure commitment on any E-body, and missing trim on a car being sold as complete is a deduction the seller has already spent.
Finally, the storage syndrome that underlies half of everything above. Challengers were cheap used cars for decades, and many sat — in barns, fields and driveways — for years at a time. A car that has sat needs its fuel system cleaned end to end (modern ethanol fuel attacks period rubber and leaves varnish in tanks and carburettors; budget $500–1,500 for tank, lines, pump and carburettor recommissioning), every brake component inspected rather than trusted, all fluids changed, and every seal assumed guilty until a few hundred miles prove otherwise. The honest question to ask any seller is not "does it run?" but "how many miles has it done in the last five years, and what was done to wake it up?" The answers price the first year of ownership more accurately than anything on the car.
How to inspect one
Allow at least an hour for the car and twenty minutes for the paperwork, and do the paperwork first: on this model, identity failures end viewings that condition would have passed. Bring a torch, a magnet wrapped in cloth, a screwdriver for prodding (with the seller's permission), a tyre depth and pressure gauge, and a phone to photograph the VIN plate, the fender tag and every stamping you find. If the car passes you, pay for a lift inspection before money changes hands — on a unibody E-body it is the best money in the whole purchase.
- Paperwork and VIN first. Match the title to the windscreen VIN plate, character by character. Read the second character (H for base, S for a genuine 1970–71 R/T series), the body code (23 for this hardtop, 29 for SE), the fifth-character engine code against the engine actually fitted, and the sixth-character year against the car's claimed year and its grille and lamp tells from the Overview. Any contradiction stops the viewing until documents resolve it.
- Body stampings and fender tag. Find a partial VIN stamping on the core support or cowl and confirm it agrees with the plate. Photograph and decode the fender tag: original paint code against the colour on the car, engine and transmission codes against the hardware, and the option codes (A53 on a claimed T/A, disc brakes, Sure-Grip) against the equipment present. Treat a fresh reproduction tag as no evidence at all, per the identity section above.
- The broadcast sheet question. Ask directly whether a broadcast sheet exists and whether you may see it. A matching sheet settles identity; no sheet means you proceed to component verification — engine casting and stampings, carburettor identity on Six-Pack and T/A cars, gearbox and axle types — and price the residual doubt. Check under the rear seat only with the seller's help and permission.
- Underneath, front to back. On a lift or with the car safely raised: prod the front frame rails, the radiator support mounts, the torsion-bar crossmember and its floor junctions, both floor pans, the rear frame rails at the spring hangers, and the trunk floor extensions. Perforation in rails or crossmember is structural and reprices or ends the deal, exactly as the rust map sets out. Read the underseal as you go — patchy and honest is old; a fresh uniform coat over everything is a question, not an answer.
- Trunk and rear window. Lift the mat and the spare wheel. Look for water staining, perforation in the floor corners and extensions, and damp. Run a fingertip around the rear window channel and the Dutchman panel; leaks here are what rotted the floor you are standing over.
- Floors, cowl and doors from inside. Lift all four carpets. Look for water tracks from the windscreen base and cowl, prod the pans, and check the kick panels for staining. Run a fingertip along every door's bottom edge for bubbling and confirm the drain slots are clear — the door-bottom and cowl checks from the rust section settle how the front of the shell has lived.
- Roof and vinyl. On a standard hardtop, check drip rails and both screen surrounds. On an SE, press every bubble under the vinyl and around the small rear window: soft means skin repair with the vinyl off, priced in the rust section, never accepted as a trim blemish.
- Cold start and engine tells. Insist the engine is cold on arrival. A slant-six that ticks loudly cold and quietens is showing its manifold crack; any engine smoking blue on start-up is showing valve seals or guides, and smoke that continues under load on the drive is rings. Listen for timing-chain rattle at the front of a small-block or 383, check the oil for fuel smell and the coolant for oil, and note the oil pressure story cold — you will compare it hot in step 10.
- Identity of the hardware. With the bonnet up, reconcile the engine with the paperwork: block casting displacement on a claimed 340, correct carburettor count and type on Six-Pack cars (three Holley two-barrels, centre plus vacuum outboards), Hemi induction and rocker covers on a claimed Hemi. Check the TorqueFlite kickdown linkage is connected on automatics — the five-minute check from the gearbox section that protects the whole transmission.
- The test drive. Fifteen minutes minimum, including a fast road. An automatic should engage promptly, shift firmly, kick down decisively and not flare on the two-three change. A manual should take second and third cleanly both ways without crunching. A Six-Pack car should cruise cleanly and surge once, progressively, as the outboards open. Brake hard from speed twice: pull means caliper or hose, judder means discs, and watch the temperature gauge throughout — hot in traffic but cool at speed is airflow; hot everywhere is a cooling-system bill.
- Heat, electrics and steering together. At hot idle, recheck oil pressure and listen again. Work the heater and blower on every setting, every window, the lights, washers, horn and gauges. Note ammeter behaviour and any flicker that suggests the bulkhead connector from the electrics section. Drive slowly on full lock both ways and then straight ahead on a flat road: centre free play that survives is steering-box wear; wander plus tyre shoulder wear is the front-end rebuild priced in the suspension section.
- Stance and interior last. Stand back on level ground and check ride height side to side and front to rear against the suspension section's tells, and look down each flank for ripples and gap inconsistencies. Then sit in every seat, feel for collapsed foam and frame, check the dash pad for cracking, the door cards' lower edges for water warp, and the headliner seams. A sound, original interior is the hardest thing on the car to recreate — weight it accordingly, and let the total of steps 1 to 12, not the shine, set your offer.

Values
The Challenger hardtop market is really several markets wearing one name, and learning to read it means learning to separate them. The computed listing and recorded-sales summary appended beneath this guide gives you the current numbers for each variant; what follows is how to interpret them, because on this model the spread within a single badge is wider than the spread between badges, and a naive average will mislead you in both directions.
Condition is the first divider, and it divides more steeply here than on most classics because the expensive work on an E-body is structural. A rust-free, documented car and a shiny car over repaired rails may present identically in photographs and sit in entirely different value worlds once a lift and a magnet have spoken. Read any price against the inspection in this guide: verified structure, verified identity and a sound original interior are the three assets that hold value, and a car missing any one of them should be compared only with cars missing the same one. Project cars — non-running, incomplete or structurally compromised — trade in a separate, much colder market where the buyer is really purchasing paperwork, a shell and a parts inventory, and where the cost to finish almost always exceeds the finished value of all but the rarest variants.
Identity is the second divider, and it is unforgiving. A verified performance car — genuine series letter in the VIN, engine code agreeing, fender tag and ideally a broadcast sheet tying the specification together — commands a premium that grows with the rarity and desirability of the variant, reaching its extreme at the top of the range where documentation can matter as much as condition. A disclosed clone or conversion trades as what it mechanically is: a base hardtop plus the value of the work and components in it, enjoyed by its owner and priced without the premium. Between those poles sits the dangerous ground of the undocumented claim, and the rule of this market is that the burden of proof sits with the price: a car priced as genuine must prove itself genuine, and a car that cannot should be valued as a conversion however convincing it looks. Matching-numbers drivetrains, original colours confirmed by the fender tag, and unbroken history files all add value in that order of importance, and each missing layer is a legitimate, quantifiable deduction rather than a matter of taste.
Variant premiums follow a logic you can reason about rather than memorise. Scarcity alone does not create value — the six-cylinder hardtops are scarce survivors and remain the softest part of the market, because demand follows performance, specification and story. The early cars carry the strongest demand, the one-year homologation special carries a devoted following out of proportion to its numbers, and the big-block performance cars anchor the top of the market, with open, manual-gearbox and high-impact-colour examples drawing the keenest bidding within each variant. The later, detuned cars trade at a clear discount to the early cars in comparable condition, which is precisely what makes a genuinely original late car the value play of the range: you are buying the same shell, the same running-gear fundamentals and the same presence, with originality that is often better because nobody spent decades modifying it. Special Edition formal-roof cars sit slightly behind their standard-roof equivalents in demand, a taste discount that a buyer who likes the formal look can happily pocket.
Asking prices and achieved prices part company on this model in a predictable pattern. Sellers of performance variants ask against the best auction result they have seen, which is almost always a verified, exceptional car; ordinary examples, however honestly presented, achieve ordinary money, and the gap between ask and achievement is widest exactly where identity is vaguest. Auction results, including the recorded sales summarised below this guide, are the honest benchmark because they are public, dated and tied to a specific car with specific documentation — compare like with like, documentation with documentation, and treat any single headline result as a description of that car on that day, not as a valuation of yours. Season, presentation and the quality of the photographic record move individual results more than sentiment about the model does.
Negotiation reality is simple. The seller's strongest ground is verified structure and verified paperwork, and on a car that has both, expect firmness and be prepared to pay for certainty — it is cheaper than buying doubt and paying specialists to resolve it. The buyer's strongest ground is the costed inspection list: structural repairs, identity gaps, a tired interior and deferred recommissioning are all real, priceable deductions, and a seller confronted with a calm, itemised list usually discovers flexibility that enthusiasm alone would never have produced. What never works is arguing that the model in general is overvalued; the market does not care, and the next verified car will cost what this one costs. Buy the car, not the argument.
Parts and ownership
The Challenger hardtop is one of the better-supported American classics of its era, for a structural reason: its mechanical life is shared with the entire Chrysler range of the period, and its popularity has sustained a reproduction industry for the E-body-specific parts that Chrysler no longer supplies. Ownership divides cleanly into what is easy, what is dear, and what is unique to this shell.
Easy and cheap. Service items across all engines — filters, plugs, points and condensers, belts, hoses, water pumps, alternators, starters and regulators — are catalogue parts at ordinary money, because the slant-six, the LA small-blocks and the B/RB wedges powered millions of Dodges, Plymouths and Chryslers. TorqueFlite parts and rebuild kits are similarly universal, the A833 four-speed is supported by specialists who rebuild nothing else, and brake, suspension and steering wear parts (ball joints, tie-rods, bushes, calipers, cylinders) are all reproduced or still listed. A competently maintained Challenger is a realistic regular-use classic on a running budget comparable to any other big American coupe of the period: expect fuel consumption in the low-to-mid teens in miles per gallon for a V8 driven normally, single figures for a big-block driven as its makers intended, and insurance and servicing in line with the car's value and use rather than its badge.
Harder and dearer. E-body-specific sheet metal is reproduced — floor pans, trunk floors, quarters and front wings are all available — but fitting and finishing it is the cost, as the rust section prices show, and panel quality varies enough that experienced restorers test-fit everything before paint. Year-specific grilles and rear lamp panels, correct Six-Pack carburettors and linkages, T/A fibreglass hoods and side-exit exhaust systems, fast-ratio steering boxes, SE formal-roof trim and small-window glass, Rallye instrument clusters and correct interior materials in the less common colours all range from expensive to genuinely hunted. Hemi-specific engine components sit in a class of their own: everything is available to those who can pay, and nothing about the bill is modest. Chrome is the universal slow cost — a full brightwork restoration is a four-figure commitment — and a quality repaint, honestly prepared, starts where most buyers' optimism ends, which is why this guide's recurring advice is to buy structure and interior and fix mechanics.
Ownership pattern. The first year with a neglected car is the expensive one: catching up deferred maintenance on a running car — fluids, ignition, carburation, brakes, tyres, bushes and the electrical connections — honestly costs a four-figure sum before you improve anything, and waking a long-stored car costs more, for the fuel-system and brake work set out in Problem areas. Thereafter a sorted car asks for ordinary classic discipline: regular use (these cars deteriorate by standing more than by driving), an annual underside inspection with the drain points and seams checked, grease and fluid intervals kept short, and the bulkhead connector and ammeter terminals inspected whenever the dash is disturbed. Club and registry support for E-bodies is strong, decoding help for fender tags and broadcast sheets is freely available from the marque community, and a documented car benefits directly: keep every invoice, photograph every stamping, and file the decode with the car, because on this model the paperwork folder is a appreciating part of the asset. Find a Chrysler-experienced independent specialist before you need one; the engines reward familiarity, and the identity questions that surround these cars are second nature to shops that see them regularly and a foreign language to those that do not.
Which one to buy
- The all-rounder: 340 hardtop. The sweet spot of the range — light, willing, genuinely quick, cheaper to buy and to run than any big-block, and new enough in spirit to use anywhere. A verified 340 car with a four-speed is the Challenger for drivers.
- The value buy: base 318 hardtop. The same shell, the same presence and the toughest engine in the range, at the soft end of the market because the badges are modest. Buy the most rust-free, most original example you can find and enjoy the car the clone market overlooks — after running the identity checks anyway, because its honesty is its value.
- The cruiser: 383 Magnum R/T. Big-block torque with the cheapest rebuild costs of any performance variant and a genuine JS VIN to anchor its value. The R/T to buy for American distances, automatic and all, without paying Six-Pack or Hemi money.
- The collector car: 440 Six-Pack or 426 Hemi R/T. The summit of the market and the summit of verification risk in the same cars. Buy only with VIN, tag, stampings and paperwork in full agreement, or do not buy at all — at this level you are purchasing documentation that happens to have a car attached.
- The homologation special: Challenger T/A. One year, one engine, and a component list long enough to keep honest sellers busy for an hour. A verified T/A is a landmark car; a claimed T/A without its A53 evidence trail is a 340 hardtop with a fibreglass hood, and must be priced as one.
- The originality buy: 1972–74 Rallye. The cheapest route to an unmolested E-body, frequently one- or two-owner cars that were never modified because there was nothing to clone them into. Slower, softer and all the better bought for it if your pleasure is preservation rather than pace.
And the rule that overrides all of the above: buy the least rusty, best documented car you can find, in the specification you can live with. Engines, gearboxes, brakes and blower motors are all fixable at prices you can plan for. A rotten unibody costs more to put right than the finished car will be worth, and an identity that cannot be proven can never be made true after the fact — and on a Challenger hardtop those are the two things that decide what you actually bought.
See the 10 Challenger Hardtop cars currently listed.
For sale now
 $39,500 · 64% below typical
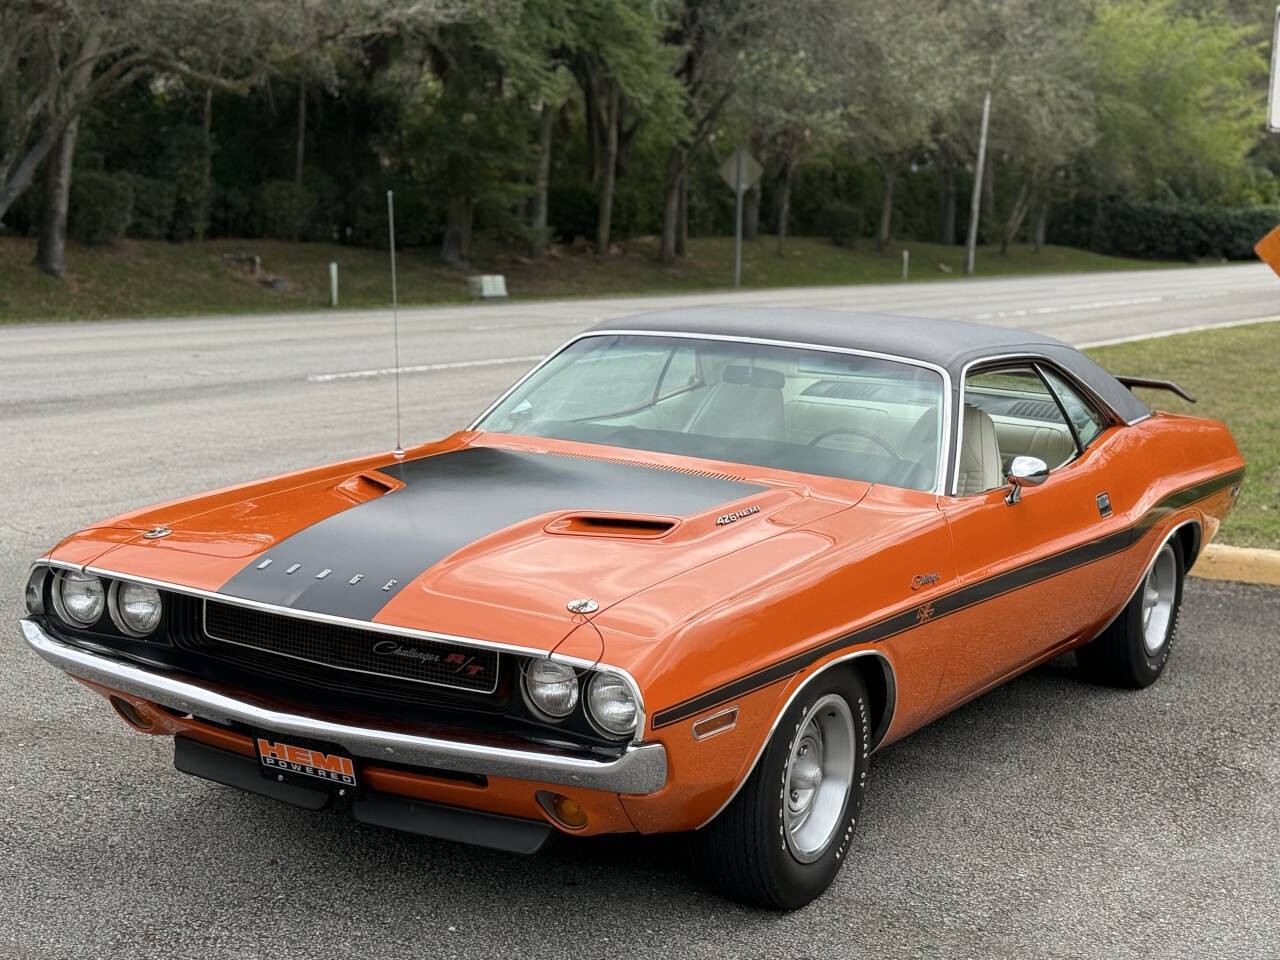 $275,000 · 153% above typical
Expand
What they sell for: Challenger Hardtop sale prices.